How to use the app
Every feature of Catch Register, screen by screen. The same explanations the info button gives you in the app — in one place, at greater length, with pictures.
Based on version 2.6
Getting started
Download, an account, then the three settings that reach every other screen: the language, the weight unit and the theme.
1. step
Download the app
Catch Register is free to download and try: from the App Store on iPhone, from Google Play on Android.
The free plan records four trips a year, and a trip can run for at most two days. To log more than that you need a subscription — or you can watch an advertisement to unlock one more.
Tip
The limits apply to logging, not to your data: the trips, catches and statistics you have already recorded stay available without a subscription.
2. step
Why you have to sign in
Your data lives in the cloud, so signing in is required: you keep your catches when you change phones, and you reach them on the website.
If you still use the old local storage, Data transfer is what saves your data to the cloud.
3. step
Ways to sign in
Email and password, a Google account, or Apple ID on iPhone — all lead to the same account. After signing up with an email we send a confirmation link.
Tip
If the confirmation link does not arrive, check your spam folder too.
4. step
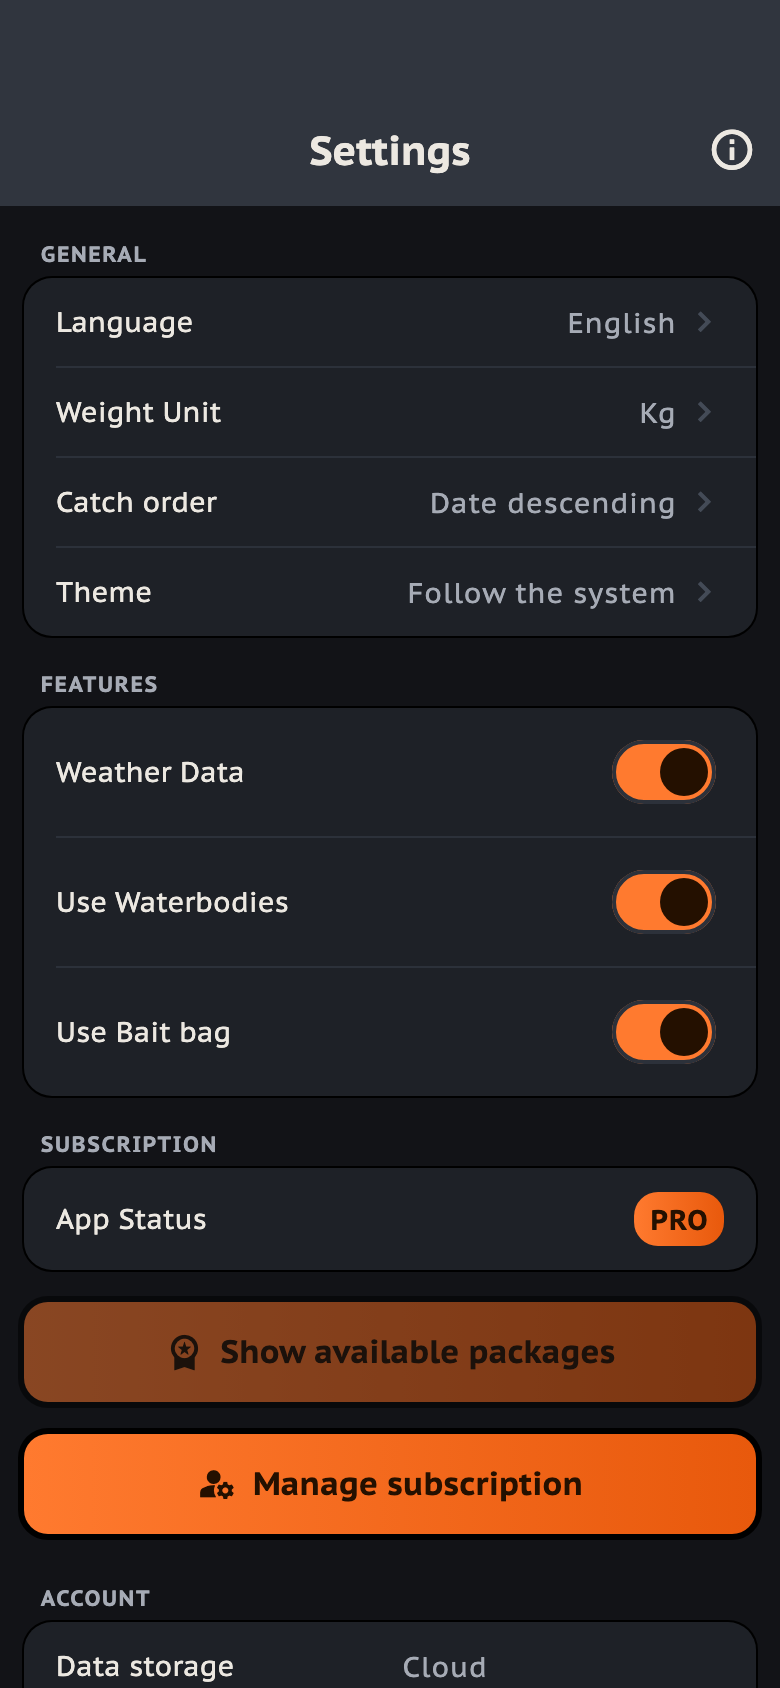
Language, unit, theme
Settings is where you pick the language, the weight unit, the order of your catches and the theme. The unit and the order apply everywhere and to everything you have already recorded — your data is not touched.
The theme can be light, dark, or follow the system setting.
Finding your way
In version 2.6 a bottom navigation bar replaced the hamburger menu. Four screens are one tap away, and everything else lives in the Menu.
1. step
The bottom bar
The bar's four items are Sessions, Statistics, Calendar and Menu. The docked + button sits in the middle, and always creates whatever the screen you are on holds: a trip under Sessions, a catch among a trip's catches.
2. step
What is where
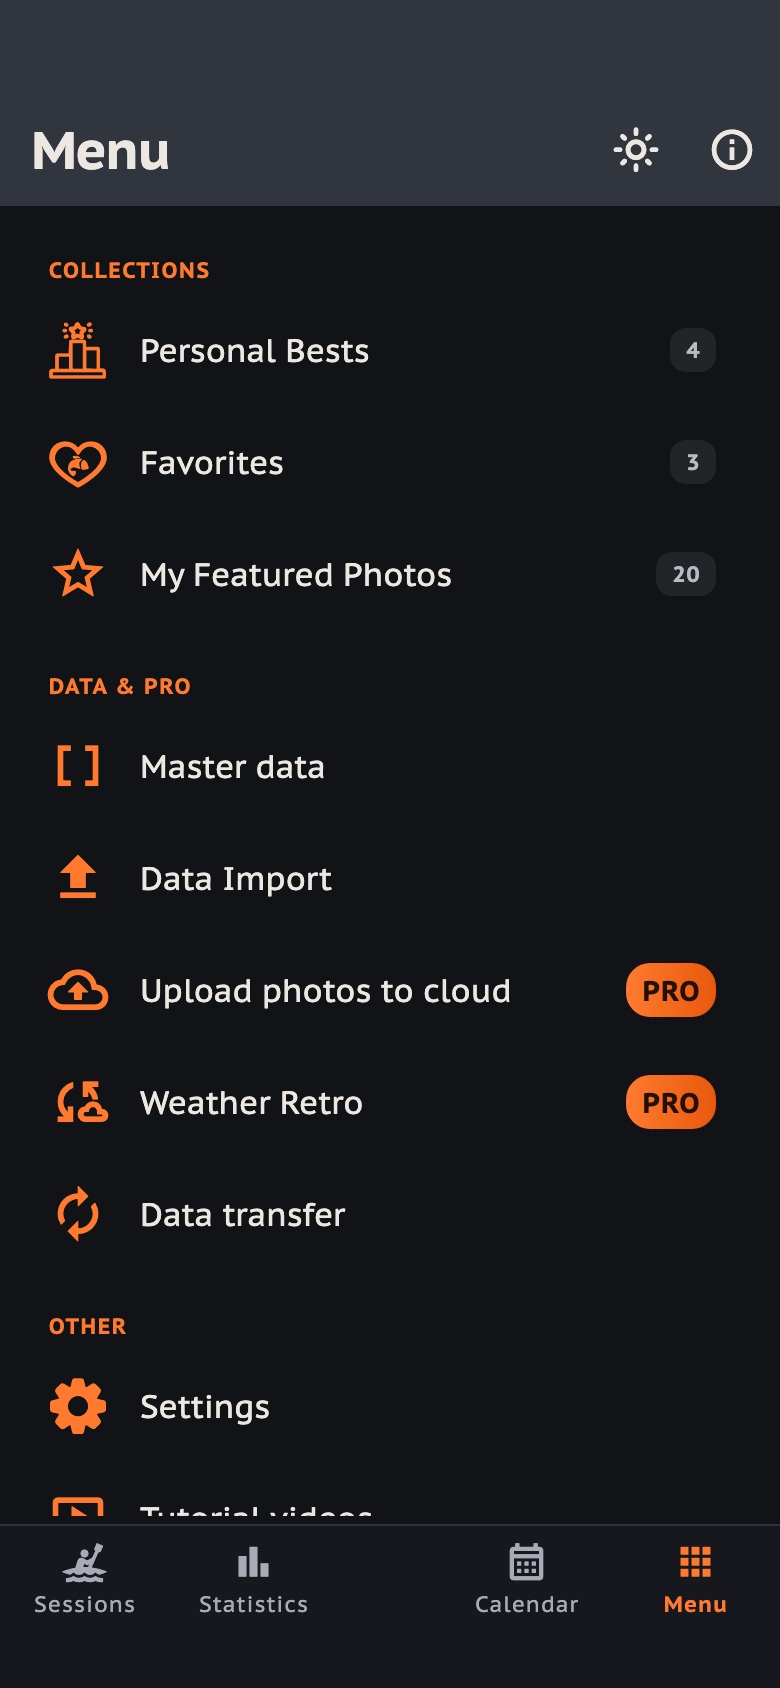
The four main screens live in the bottom bar; the Menu gathers everything else into three groups: Collections, Data & Pro, and Other. The number at the end of a collection row is how many items it holds.
3. step
The PRO items and the theme switch
Rows marked PRO need a PRO subscription; your plan is in the settings, and so is buying one. The moon / sun in the title bar is a quick theme switch — following the system is a setting.
4. step
Help on every screen
Every significant screen has an info button in its title bar, which explains that screen on a few short, illustrated pages you can swipe through. Nothing pops up on its own: it opens when you open it.
This page walks through those same explanations, in one place and at greater length.

Fishing trips
Every catch belongs to a trip. A trip is the frame of place and time: once it exists, logging a catch is a few taps.
1. step
New trip
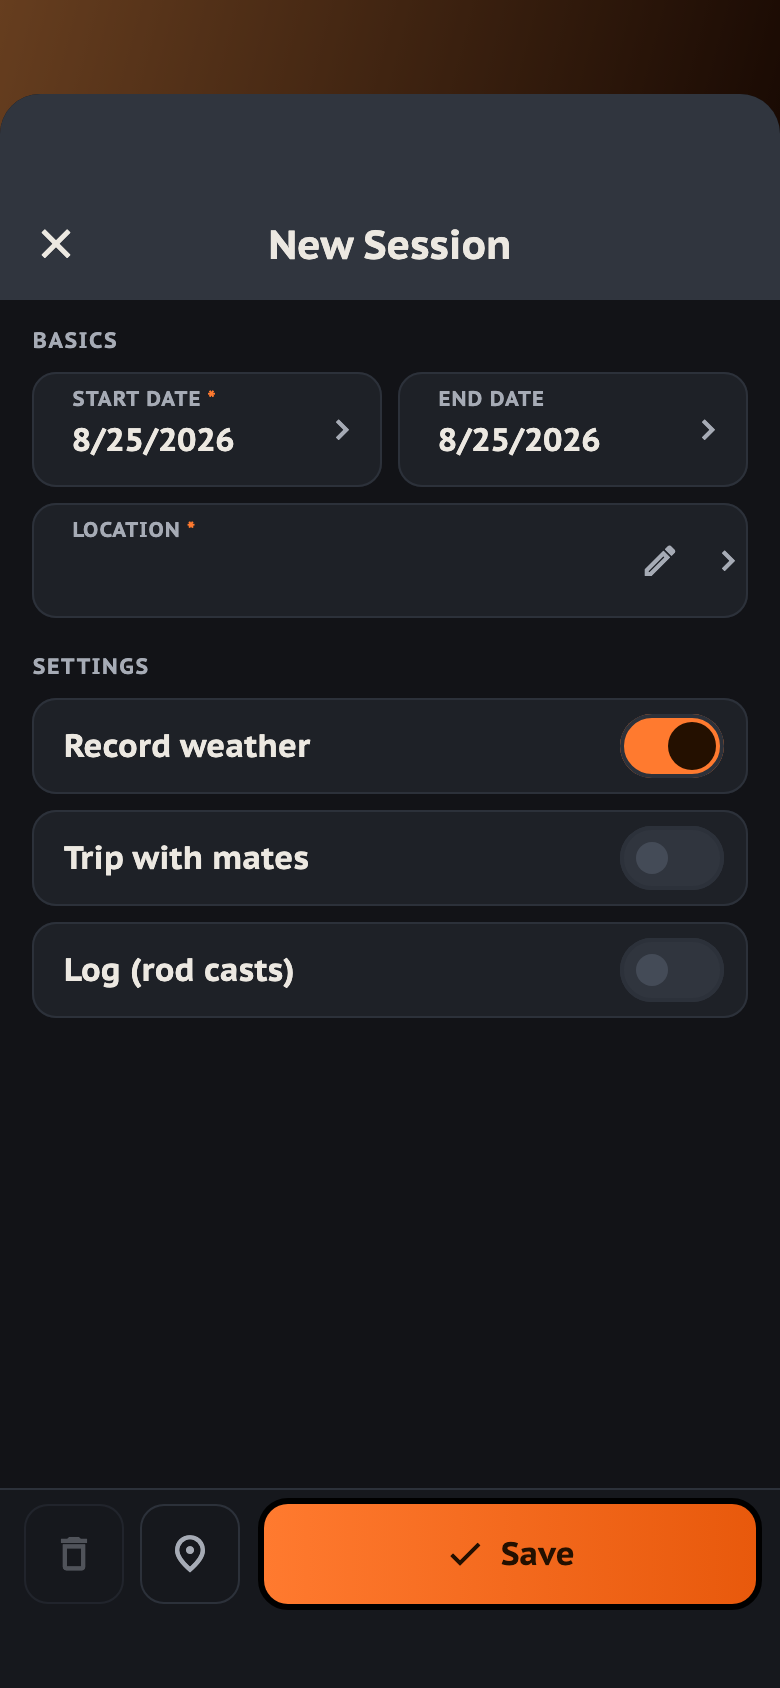
The + button in the middle of the nav bar starts a trip: a start date and a place are enough. Pick the place from your Waterbody master data, or tap the pencil to type one.
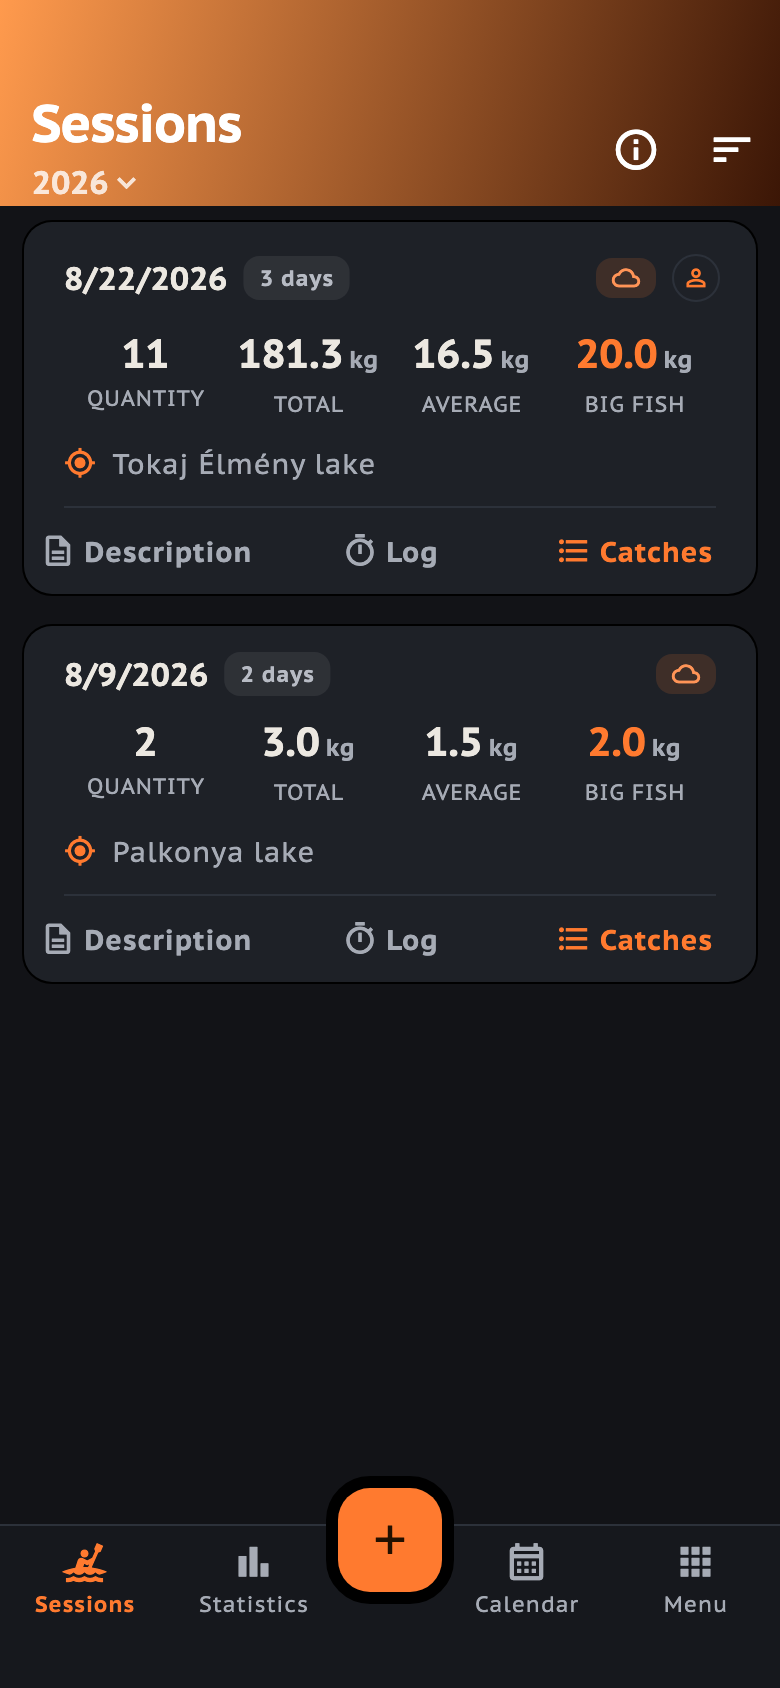
The card's header then carries the essentials: the start date, the day count on a longer trip, a mate icon when others are along, and the temperature if you record the weather. Under it are the trip's numbers: count, total, average and the Big Fish.
Tip
Three buttons at the bottom of the card take you on: Details, Log and Catches — Catches is the main one.
2. step
Location and weather
The Location button saves the trip's GPS, which its catches inherit, and Record weather looks the weather up for that place. Where it is on, a cloud marks the card.
Settings decides whether new trips start with it on.
3. step
Trip with mates
With it on, the catch form gets a Mate field for your mates' catches. The icon in the header switches whose numbers the card shows.
Tip
Leave the Mate field empty for your own catches, or they will not count as yours.
4. step
Log — your casts
Turning the log on asks for the number of rods and where the numbering starts. You then keep your casts under the card's Log button.
5. step
Edit and delete
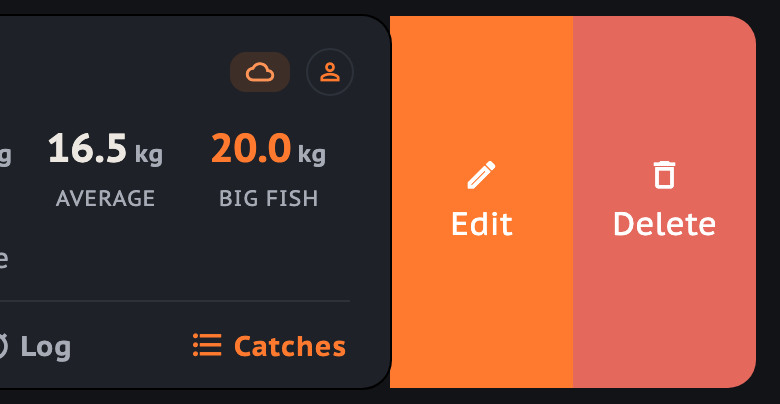
To edit or delete a trip, drag its card to the left. Deleting a trip deletes its catches as well, so it asks first.
Catches
A catch is the point of the log: a species and a weight are required, everything else — rig, bait, weather, photo — is optional and can be added later.
1. step
New catch
The + button adds a catch to the trip. With weather on, the catch appears at once and its weather data is fetched in the background.
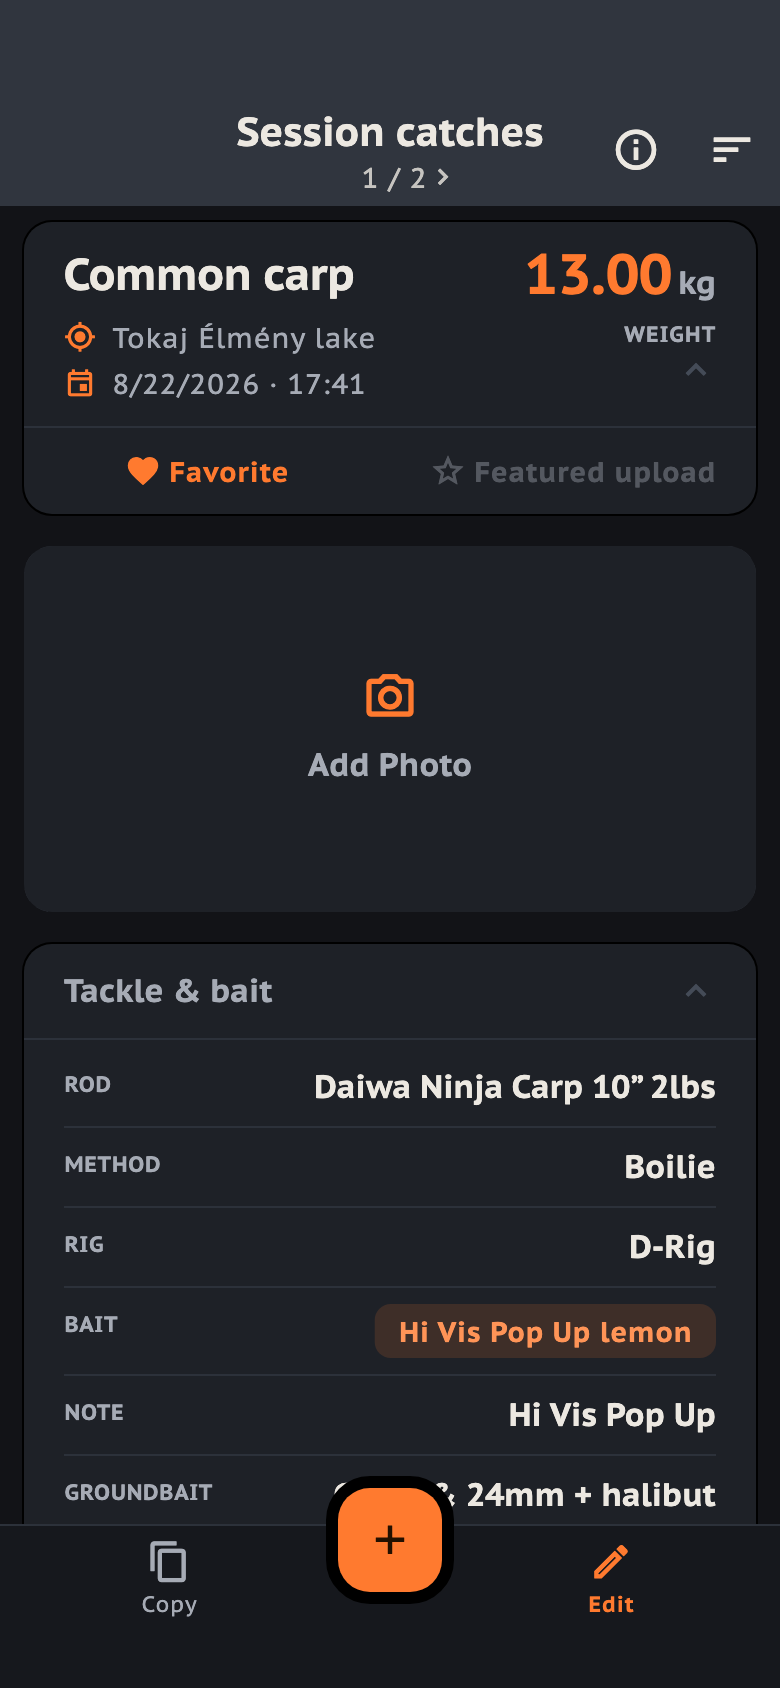
The catch card shows the species, the place, the date and the weight at a glance, with fold-out cards for the photo, the tackle and the weather below.
Tip
If the weather cannot be fetched — no signal on the bank, say — the catch is saved all the same, just without it. The data can be filled in later with Weather backfill (PRO).
2. step
Favorite and featuredCloud account
Tap the header to fold out Favorite and Featured upload. An accepted photo goes up on the app's website, where everyone can see it.
3. step
Bait on the form
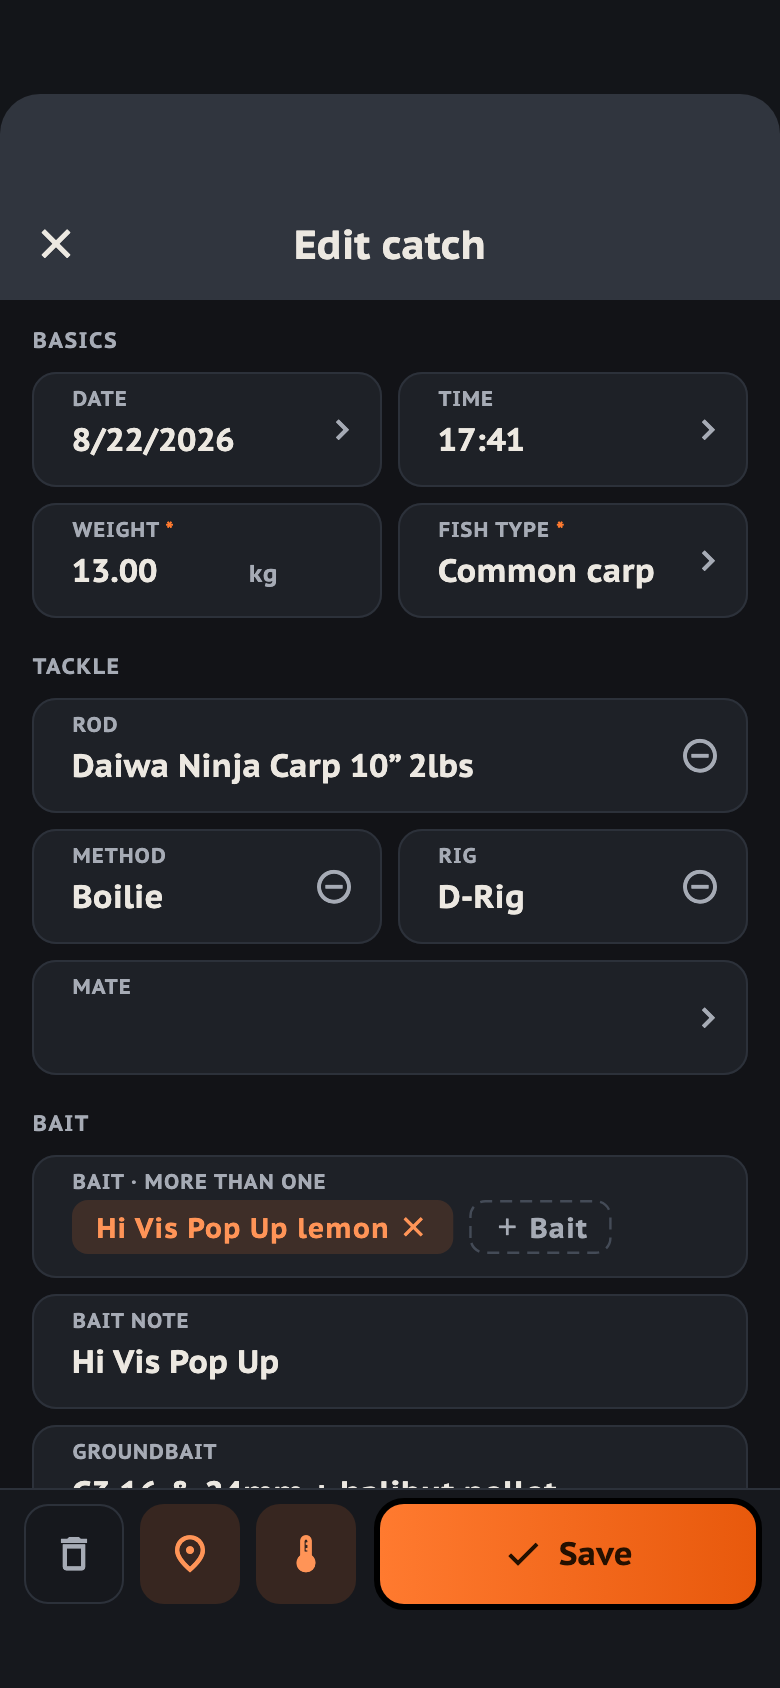
With the bait bag on, you add the bait of a catch as chips: the dashed “+ Bait” picks from your list, the ✕ takes one off. Without the bait bag you type it into the Hookbait field.
4. step
Editing, location, weather
Edit in the bottom bar opens the form. There the location and weather buttons show whether the catch has that data: empty they fetch it, filled they refresh or drop it.
A missing coordinate can also be set by tapping the map, for both trips and catches.
5. step
Sorting and paging
Drag sideways to move between the catches of the trip; the arrows under the title only show which way there is one. The icon at the top right sorts them by date or by weight.
Copy in the bottom bar opens a new catch with the current one's details — the fastest route when you are logging a run of fish.
6. step
How a photo gets featuredCloud account
You submit a photo from the catch card, on the fold-out part of its main data — one per catch.
7. step
What happens after that
We review the photo: approved it goes onto our website, refused the card tells you why.
Your submissions are under Menu → My Featured Photos. That is where you see where each photo stands in the review, and where you withdraw one.
Session log
Here you can follow how your casts are going: when you cast in, with which bait, and what came of it. It is most useful on longer trips.
1. step
New cast
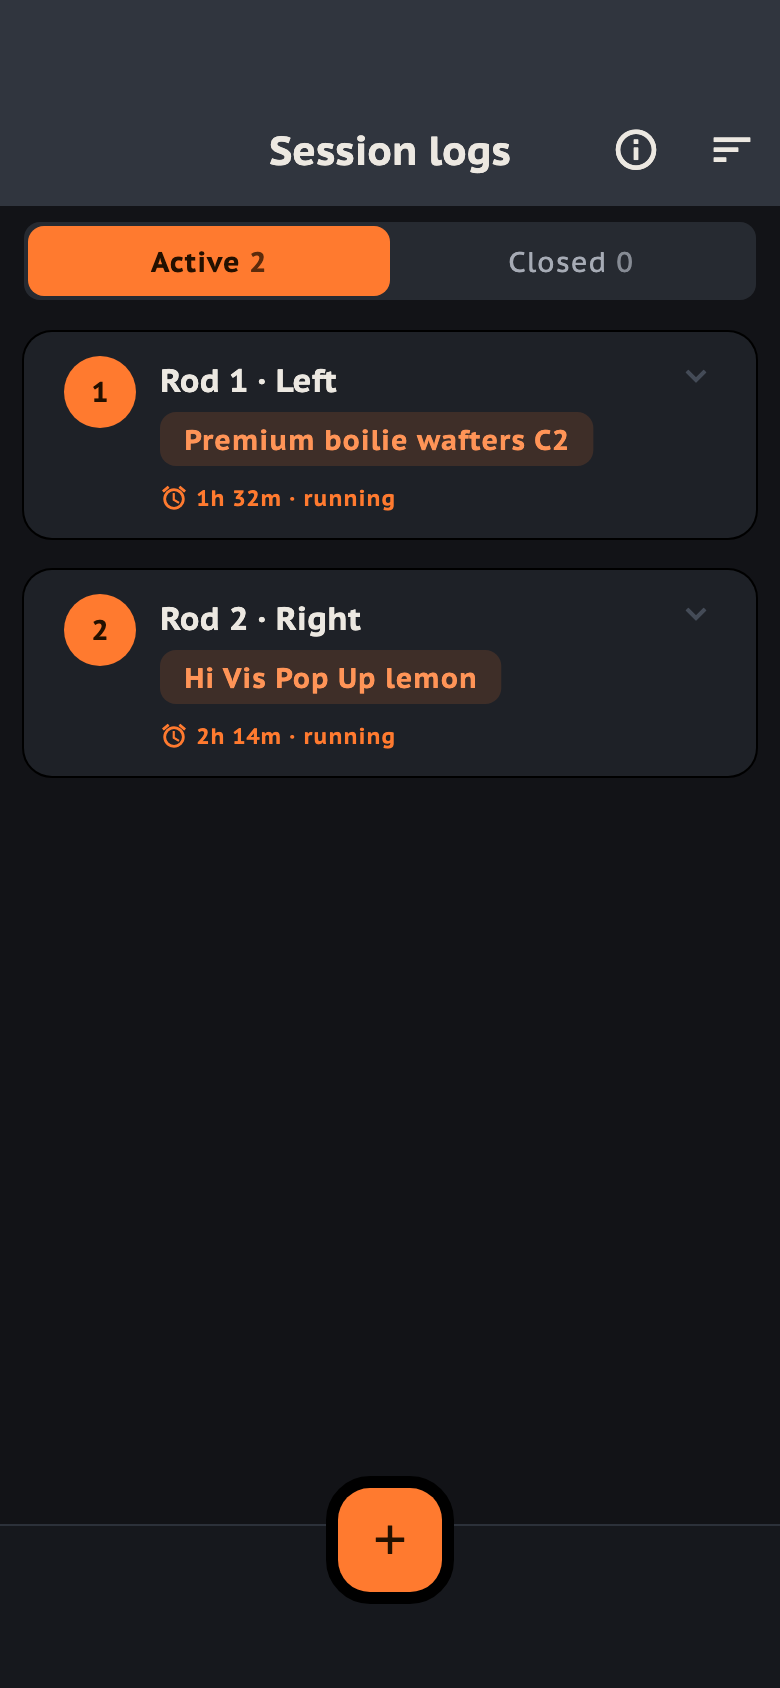
The + button records a new cast. Only as many entries can be active as the trip has rods — when they are all out, close one first, or raise the rod count on the trip.
The switch at the top moves between the active and the closed entries, with a count on each.
2. step
Live time and timer
An active entry counts the elapsed time on its own. With a planned end, a bar shows the time left, and you can turn the timer on: it sends a notification at that time.
3. step
Closing a cast
Open a card and you can close it with one of three outcomes: Catch, Lost fish, No bite. Each asks when the rod came in; Catch also opens the catch form and links the saved catch to the entry.
Tip
Whatever you enter on the cast — rod, method, rig, bait, groundbait, note — is carried into the catch form, along with the time the rod came in. The more you fill in here, the less is left to do when you log the catch.
4. step
A closed entry
Re-open puts the entry back among the active ones, but unlinks its catch — the catch itself stays. The middle cell links a catch to the entry, or unlinks it.
Tip
Edit and Re-cast are on the left swipe.
Statistics and records
The summary lives on two screens: Statistics shows the year in numbers and charts, Personal Bests your heaviest catches per species. Favorites is the list of the catches you starred.
1. step
The year in numbers
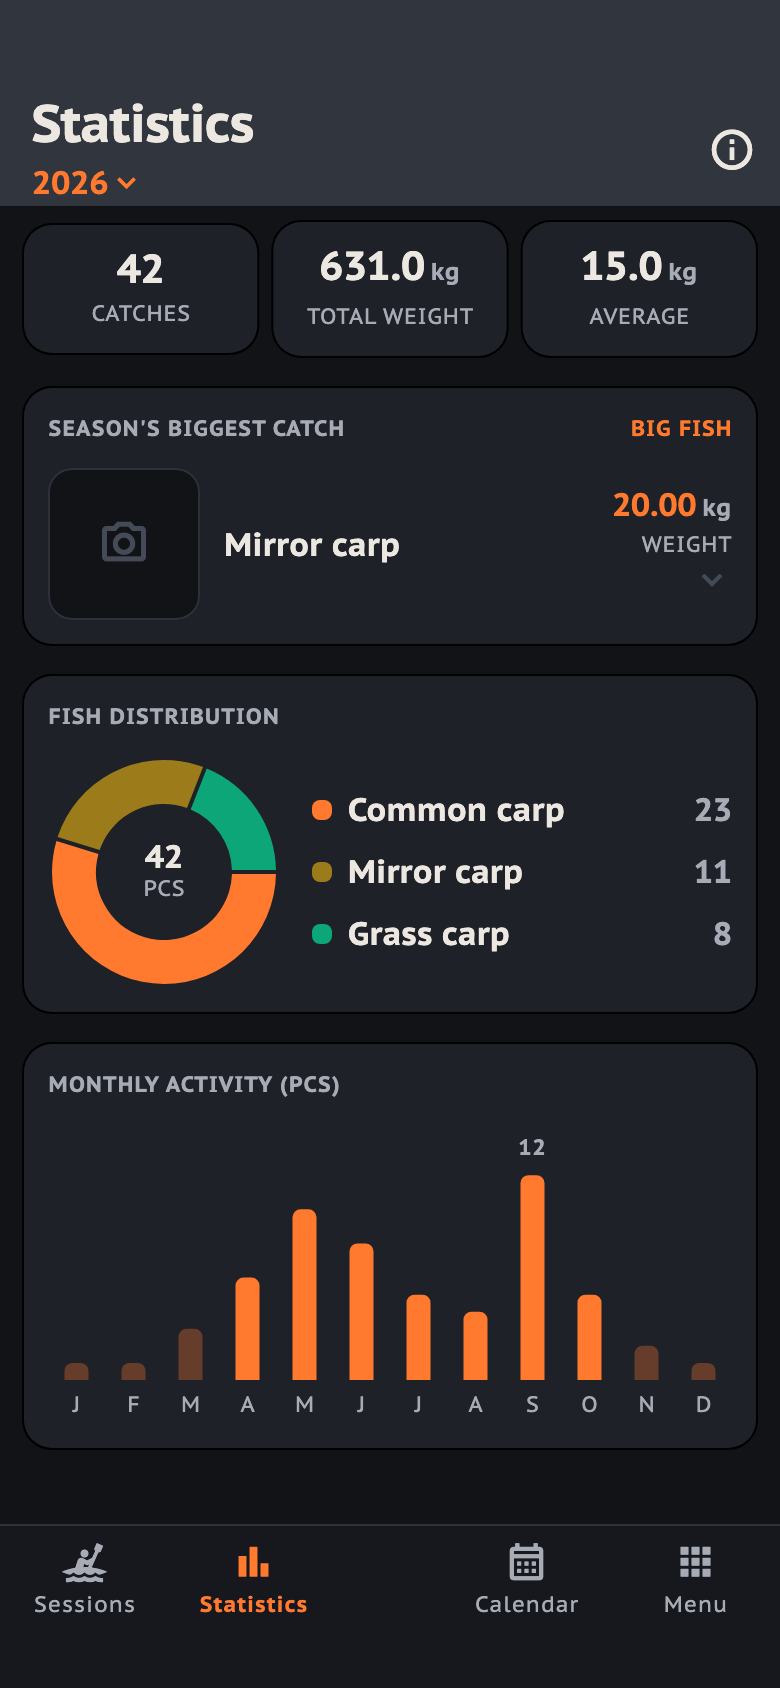
The tiles sum up the year picked under the title: the count, the total weight and the average. The “All” view adds up every year you have.
2. step
The season's biggest
The heaviest catch of the year gets its own card, with the weight in the Big Fish colour. Tap the card for the place, the date and the time, and for the way to the catch itself; tap the photo to see it full size.
3. step
The two charts
The ring splits the catches by species; from the fifth on, everything lands in the “Other” slice. The bars are the catches per month — the best month is labelled, the rest answer on a tap.
4. step
Medalled records
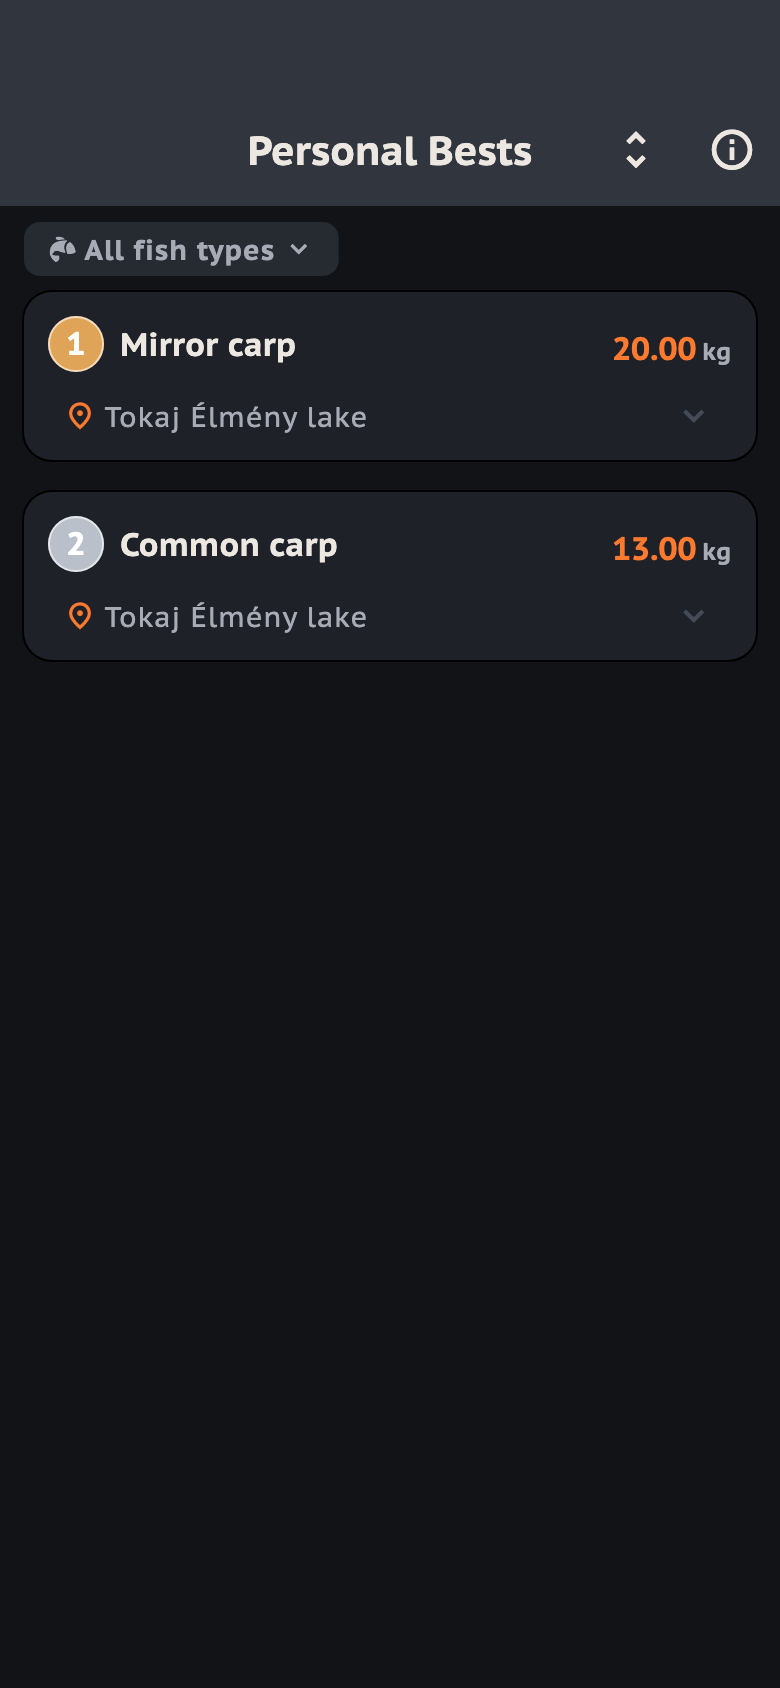
Your three heaviest catches of each species get a medal: gold, silver, bronze. From the fourth on the number comes without one — still a ranking, just not a podium.
5. step
Filter by species
The chip over the list narrows the records to one species. The same screen also shows the waterbody and bait lists opened from your master data — those you can order by date and weight.
6. step
Folded out
Tap a card for the date and time of the catch, the temperature and the pressure, and the bait. The whole weather set is on the catch itself — the button takes you there; the place opens a map.
Calendar
The calendar answers when you were on the water — and what the moon was doing. From the year you step into a month, from the month into that day's catches.
1. step
The year at a glance
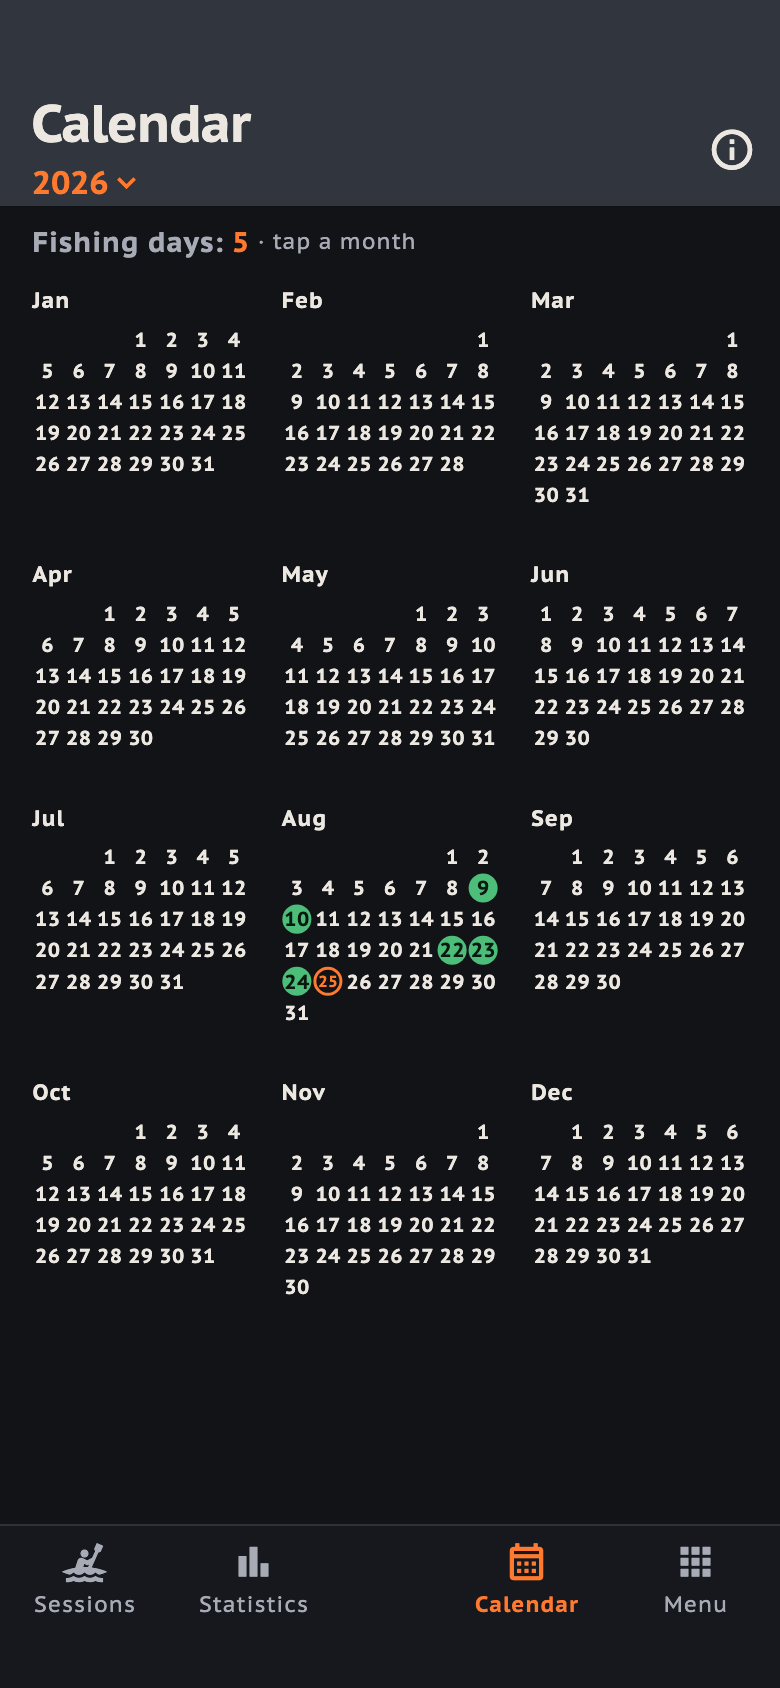
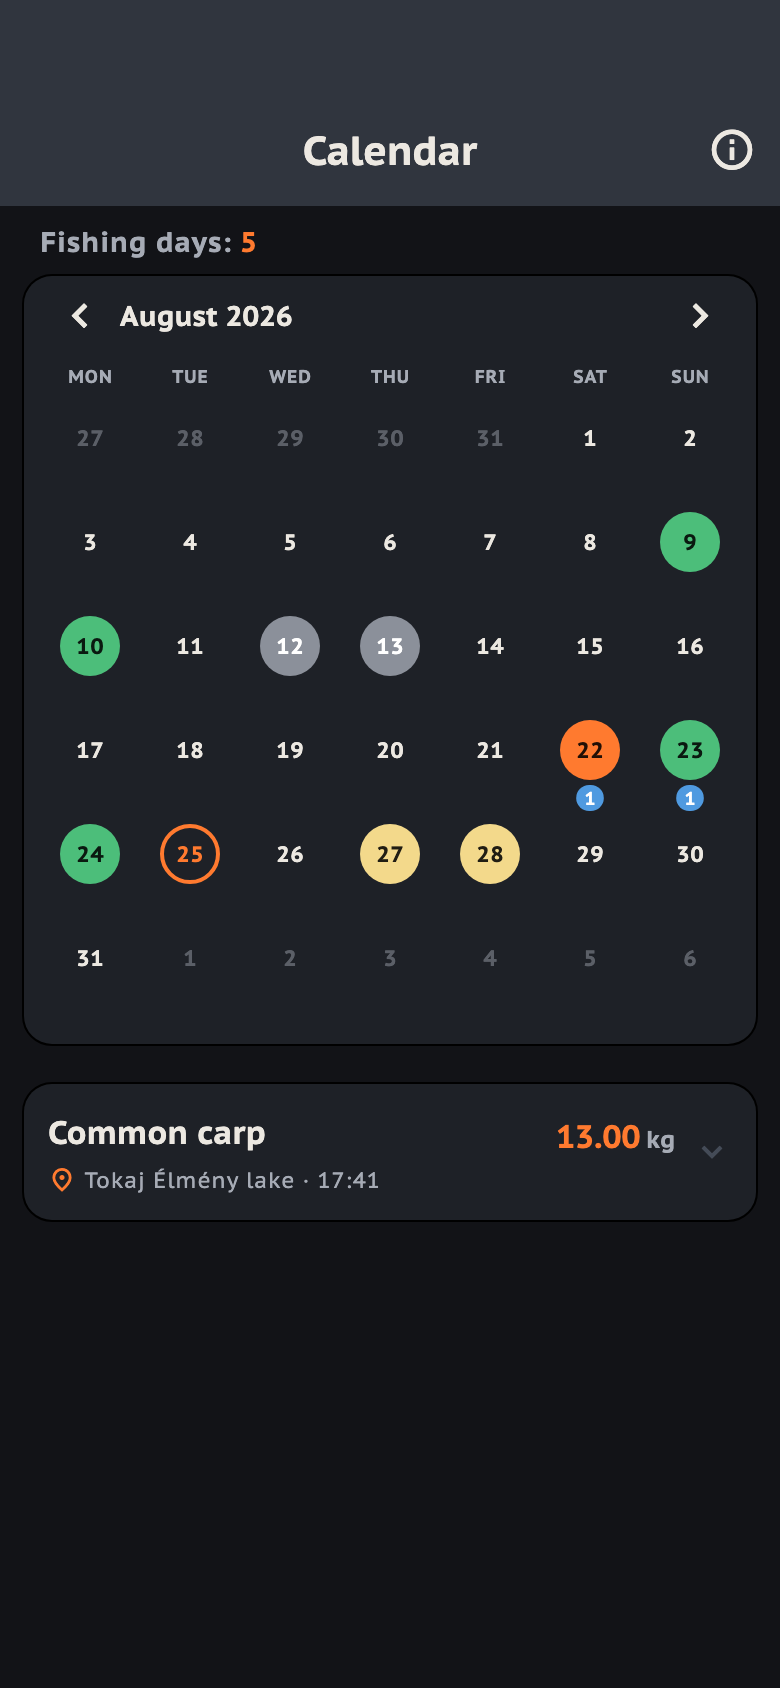
The days of all twelve months in one grid: the green circles are your days on the bank, an orange ring marks today. The count above adds them up for the whole year.
2. step
Year and month
The year selector belongs to the calendar alone — the year of the Sessions screen does not follow it. Tap a month to open it day by day.
3. step
How the days are marked
A green circle is a day on the bank, orange is the selected day, and a ring marks today. The blue number under a circle is how many catches that day holds.
4. step
Moon phase
A full moon fills the circle yellow, a new moon grey. On a day you also fished, the moon stays as a ring around it; press and hold to read the phase.
5. step
The catches of the day
Under the grid are the catches of the selected day. Opening a card shows the weather, the bait and “Open catch”; their order follows the catch order in Settings.
Master data
Master data is your own set of lists: species, methods, rods, rigs, mates, waterbodies, baits. They start empty, so they only ever hold what you actually use.
1. step
What it is for
What you add here is what the catch and log forms offer you in their pickers. The number at the end of a row is how many active items it holds.
2. step
Favourites and search
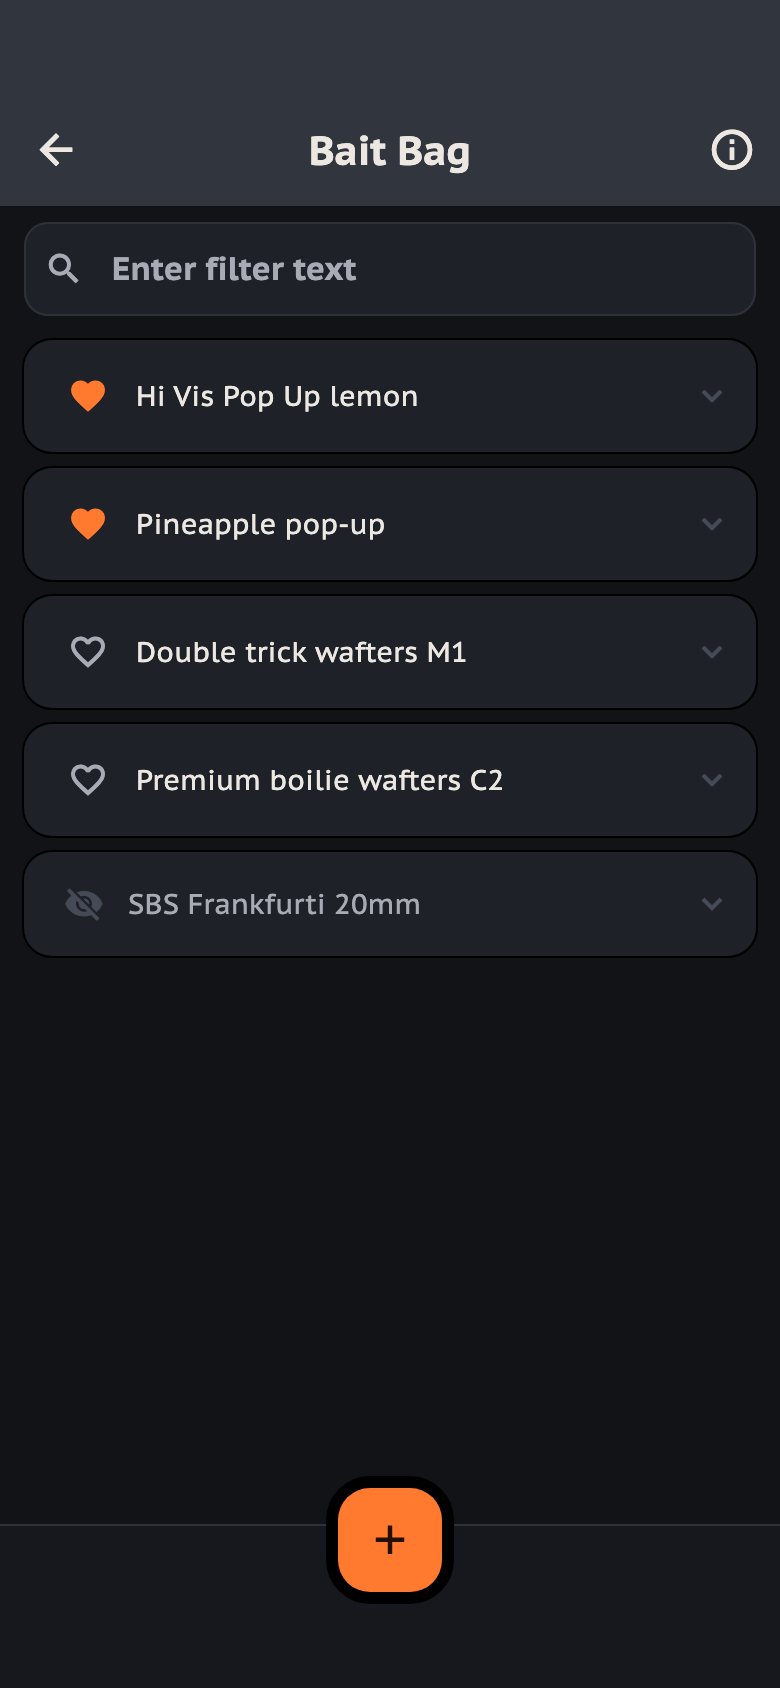
Items marked with a heart move to the top; the order is only redone when you leave the screen, so nothing jumps out from under your finger. The search narrows a long list.
3. step
Delete or deactivate
Swipe left to delete or to deactivate. A deactivated item stays on your old catches, it is simply no longer offered: faded, at the bottom of the list.
Tip
An item already used on a catch or a log entry cannot be deleted — only deactivated. Your older records stay as they are, and your picker list still gets shorter.
4. step
A new item
The + adds a new item; most types only need a name. In the bait bag the name is assembled from the parts you switch on (maker, type, flavour, size) — the eye takes a part in or out.
5. step
Waterbodies and the bait bagCloud account
These two categories only appear once you switch them on in the settings — and they need cloud storage.
The weather switch in Settings, by the way, only sets the default for a new trip: the trip's own switch has the last word, and a catch inherits it.
Pro and the cloud
A subscription first lifts the free plan's limits — four trips a year, two days each — so you can log without a ceiling. The Pro plan adds two things on top: cloud storage for your catch photos, and the weather your older catches were logged without.
1. step
Subscription and account
Settings shows your plan. “Available packages” is where you buy; “Manage subscription” is where you cancel, restore a purchase or ask for a refund.
2. step
Photos to the cloudPRO
The photos attached to your catches stay on the phone; Menu → Upload Photos carries them to the cloud as well, so you keep them when you change devices. The number says how many are still waiting.
3. step
While the upload runsPRO
Keep the app open during the upload, and run it on Wi-Fi if you can. You can stop it: what went up stays up, and resuming picks up from there. Failed photos can be retried.
4. step
Weather backfillPRO
It fetches the weather your older catches were recorded without. A catch needs both a time and a location for that — “Has GPS” counts the ones that have both. Tap any tile to see exactly which catches it stands for.
Tip
The weather archive reaches back to 2 August 2021; earlier dates have no data.
5. step
Catches without a locationPRO
A trip with no coordinates cannot be looked up. The map icon gives the whole trip a location at once; the arrow opens the trip so you can set them catch by catch.
6. step
The monthly allowancePRO
The fetch works from a monthly allowance that starts over every month. One job runs at a time: the server works through it in batches, the bar at the bottom shows the progress, and you can close the app meanwhile.
7. step
Your data in a browserCloud account
The data in your cloud account is reachable from a browser too: under My page you get your statistics, your personal bests, your trips, your trophies and your featured photos — the same data you see on the phone.
Your data
Bringing an old log in, moving everything to a new phone, or watching a video about where things are — these four screens work around your data.
1. step
Data import — the template
The orange button downloads the spreadsheet for your language. Its Explanation sheet says what belongs in each column, which is the place to start.
2. step
Uploading
Hand in the filled file with the + button. The import runs on the server: the card shows its status and progress, and you can close the app meanwhile.
3. step
When something is off
Rows with errors are left out and the rest are imported. Fold the card open to see what went wrong row by row, fix it in the file and upload it again.
4. step
Data transfer — what it is for
This screen moves your data between the phone and the cloud. From local storage it carries everything up; on a cloud account the data already lives in the cloud — there this carries the original photos from the old phone to the new one.
5. step
Before you start
A transfer overwrites the data on the device, so do not interrupt it: leave the app open until it finishes. Photos are parked in the cloud for the transfer and deleted from there afterwards.
6. step
Tutorial videos
Every screen explains itself behind its own info button; the recordings under Menu → Tutorial videos introduce new features.
The language icon in the title bar switches between the Hungarian and English recordings. Playback can use a lot of data, so we ask first on mobile.
7. step
Deleting your account and data
Your account and everything in it can be deleted at any time: Settings → Log out, then Delete account on the screen that appears — you sign in once more to confirm.
Deletion covers the data and photos stored in the app; the pictures in your phone's gallery are untouched.
What changed in 2.6?
The bottom navigation bar, the built-in tutorials and the new Pro features on one page.
Release notesStill stuck?
The frequently asked questions give short answers, or write to us — we are happy to help.